


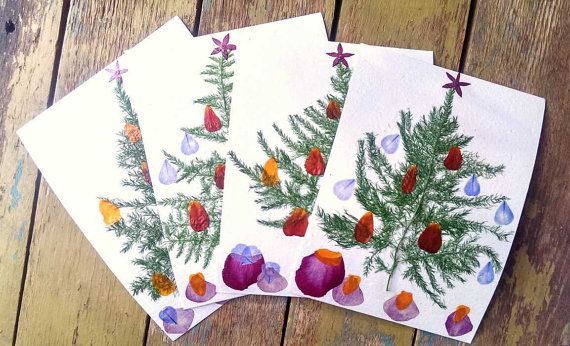
How to use pressed flowers to make Christmas cards
Every year we end up spending money on all the same kinds of Christmas cards. When you frequent all of your local shops, you can’t help but get the feeling that they all ordered the same stock and they all seem quite generic. Since it’s so difficult to find something new and original, the best thing to do is to make your own Christmas cards. That way, at least you know that each one you make is indeed one of a kind. Avoid the usual images like Santa, snowmen and anything that has become a cliché. How do ensure originality yet versatility? By using flowers to decorate your Christmas cards! Pressed flowers are excellent for various crafts, including decorating festive cards. When you think about how many people send flowers for Christmas, it makes sense that flowers can also send a festive message in the form of a Christmas card.
What you need:
- Dried, pressed flowers of your choice
- Sheets of cardboard cut to the various sizes you need to make your Christmas cards
- Wood glue
- Tweezers
- Toothpicks
Instructions:
- Take your first piece of cardboard and fold it in half to establish which side will form the front of the card. Cardboard is ideal because regular paper is too flimsy and won’t hold up as well. Especially with the added weight of the glue and flowers.
- BEFORE you apply any glue, you need to arrange your flowers on the front of the card and establish exactly how you intend on arranging them. This is the time to play around, move them around, try alternative positions for your flowers and experiment until you’re completely happy with the result.
- Once you have planned your design, you need to remove each one carefully and remember which ones were placed where and which flowers were overlapped by others. A handy tip is to take a photo with your phone or camera if you are worried that you might forget something along the way.
- Pour some wood glue into a bowl to make it easier to work with.
- Start with the flowers that are grouped together as the bottom layer and glue them into place one by one. Use a toothpick or tiny brush to apply the glue to the back of the flower. You can also use the tweezers to hold the flower while applying the glue so that you don’t get sticky hands in the process. By keeping your hands nice and clean you will also reduce the risk of getting glue all over your flowers.
- Once the flower is in place, you should press down very gently in order to make sure that it is properly stuck to the cardboard. If need be, add some more glue under any petals that don’t stick in place.
- Once you have the first layer down, it’s time to position the next round of flowers and continue in the same manner until your design is complete and your final beautiful flower is in place.
What makes these designs so great is the fact that you can use just about any type of flower. Provided the flower can be pressed, it can be used to decorate a greeting card! If you are looking for ideas for designs and you want to learn how to arrange your pressed flowers, you can always take a look around for flowers online. Take note of professional arrangements created by online florists and replicate these bouquets in the form of a pressed design. Other sources for inspiration include famous floral works of art that you can also view and study online.
Remember that it is very important that you use wood glue instead of trying to use any other kind of glue. Super glue is really harsh and tricky to work with. Besides this, it’s bonding power really isn’t necessary for such a delicate project. Super glue is also not suitable for children to work with whereas wood glue is perfectly safe. Stick glue is not as strong as wood glue and, when you try to apply the glue, you will most likely damage the flower in the process. Again, this would be a tricky glue for children to work with since they might not have mastered the art of working delicately.